How to Darn a Heart
Whatever the time of year, your clothing is worthy of love and care, and creating a heart shaped darn is just one way of mending a small hole. Spending time looking after your clothing will increase its life, and by doing so save resources, save you money, and reduce waste. You'll also end up loving it more.
If you fancy getting creative with your mending, creating clear shapes is one way to do that. Here is how I have gone about creating a heart shaped darn. I've not shown it worked over a hole, but it would be the same steps to make it a functional repair. Alternatively, just add it as decoration and customise something that you’re a bit fed up with to give it a new lease of life.

These heart shaped darns are really quite large, and smaller ones would be really lovely too! They could make a lovely alternative to polka dots, and can be multi coloured or worked in a single colour.
Instructions for creating your own heart-shaped mend:

You will need: a garment that needs some TLC to work onto, scrap paper (I've used an old envelope), a pen/ pencil, a needle, scissors (I used two pairs, one for paper, and one for my yarn), sewing thread (optional) and darning yarn.

Step 1: Fold your paper in half, and draw half a heart on one side of the fold. It can be any size you like, but make sure it will adequately cover your hole.
Step 2: Cut along your line, and unfold the paper to see the full heart shape.

Step 3: Place the paper heart over your hole. You have 2 options now. You can either hold it in place and draw around it with the pen (or use something that will come out with washing), or, you can pin it in place and stitch around it using sewing thread and small running stitches, which is what I've shown here.

Step 4: With your darning yarn, work up and down across the heart shape, working just outside your outline to create your warp. If you chose the sewing thread option, once you have finished this you can then unpick the sewing thread.
For detailed, step by step darning instructions see my book or video tutorials.

Step 5: Work across the heart, weaving in and out of your warp.
Step 6: Secure your ends by sewing them in at the back on the fabric behind the darn. A few stitches up and down are normally enough.
Step 7: Press.
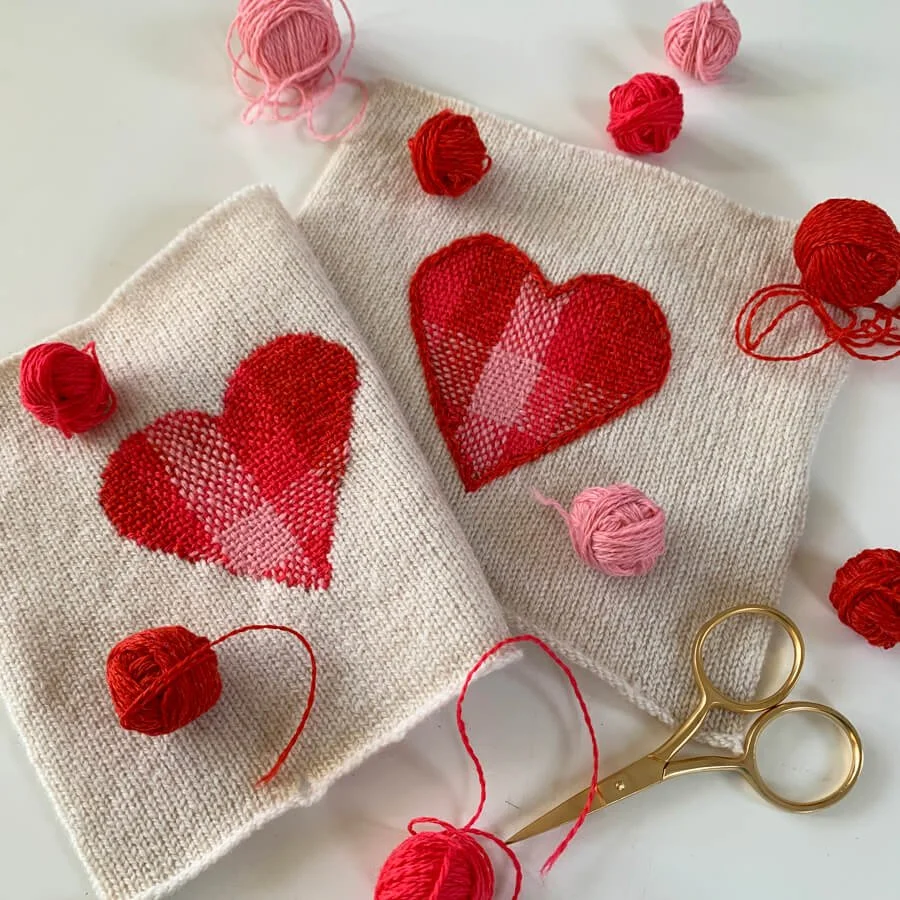
If you want to add more, you could add stitching around the edge of the darn. For example, I added chain stitch around the edge of one of mine, and then added some French knots dotted around it.
You can approach any shape of mend in the same way, and my circle darning stitch tutorial will show to exactly what to do in more detail if you’d like it.

Learn Visible Mending in More Detail
If you would like to learn more about darning and knitwear repair, whether that's advice choosing materials, what to look for in knitted fabrics, assessing the damage of your garment, or detailed step by step instructions and tips, my book ‘Visible Creative Mending for Knitwear’ has got you covered!
If you prefer to learn by watching, then sign up to one of my visible mending workshops held both online and in person (but not both together!) which cover a range of mending techniques: darning, swiss darning, repairing frayed cuffs and edges, and more advanced swiss darning techniques for textured knits.
If you can’t make a live workshop, then I also have visible mending video tutorials.
I hope this has given you some ideas for repairing your clothes! I think the main thing is to have fun in the process. How you go about the repairs is really up to you- just go with something you like and want to wear.